Saved filters
The saved filters feature allows you to save your current filters. This is specially useful when you find insights and would like to save the state of your dashboard before removing the current filters to keep exploring the data.
Creating a saved filters item
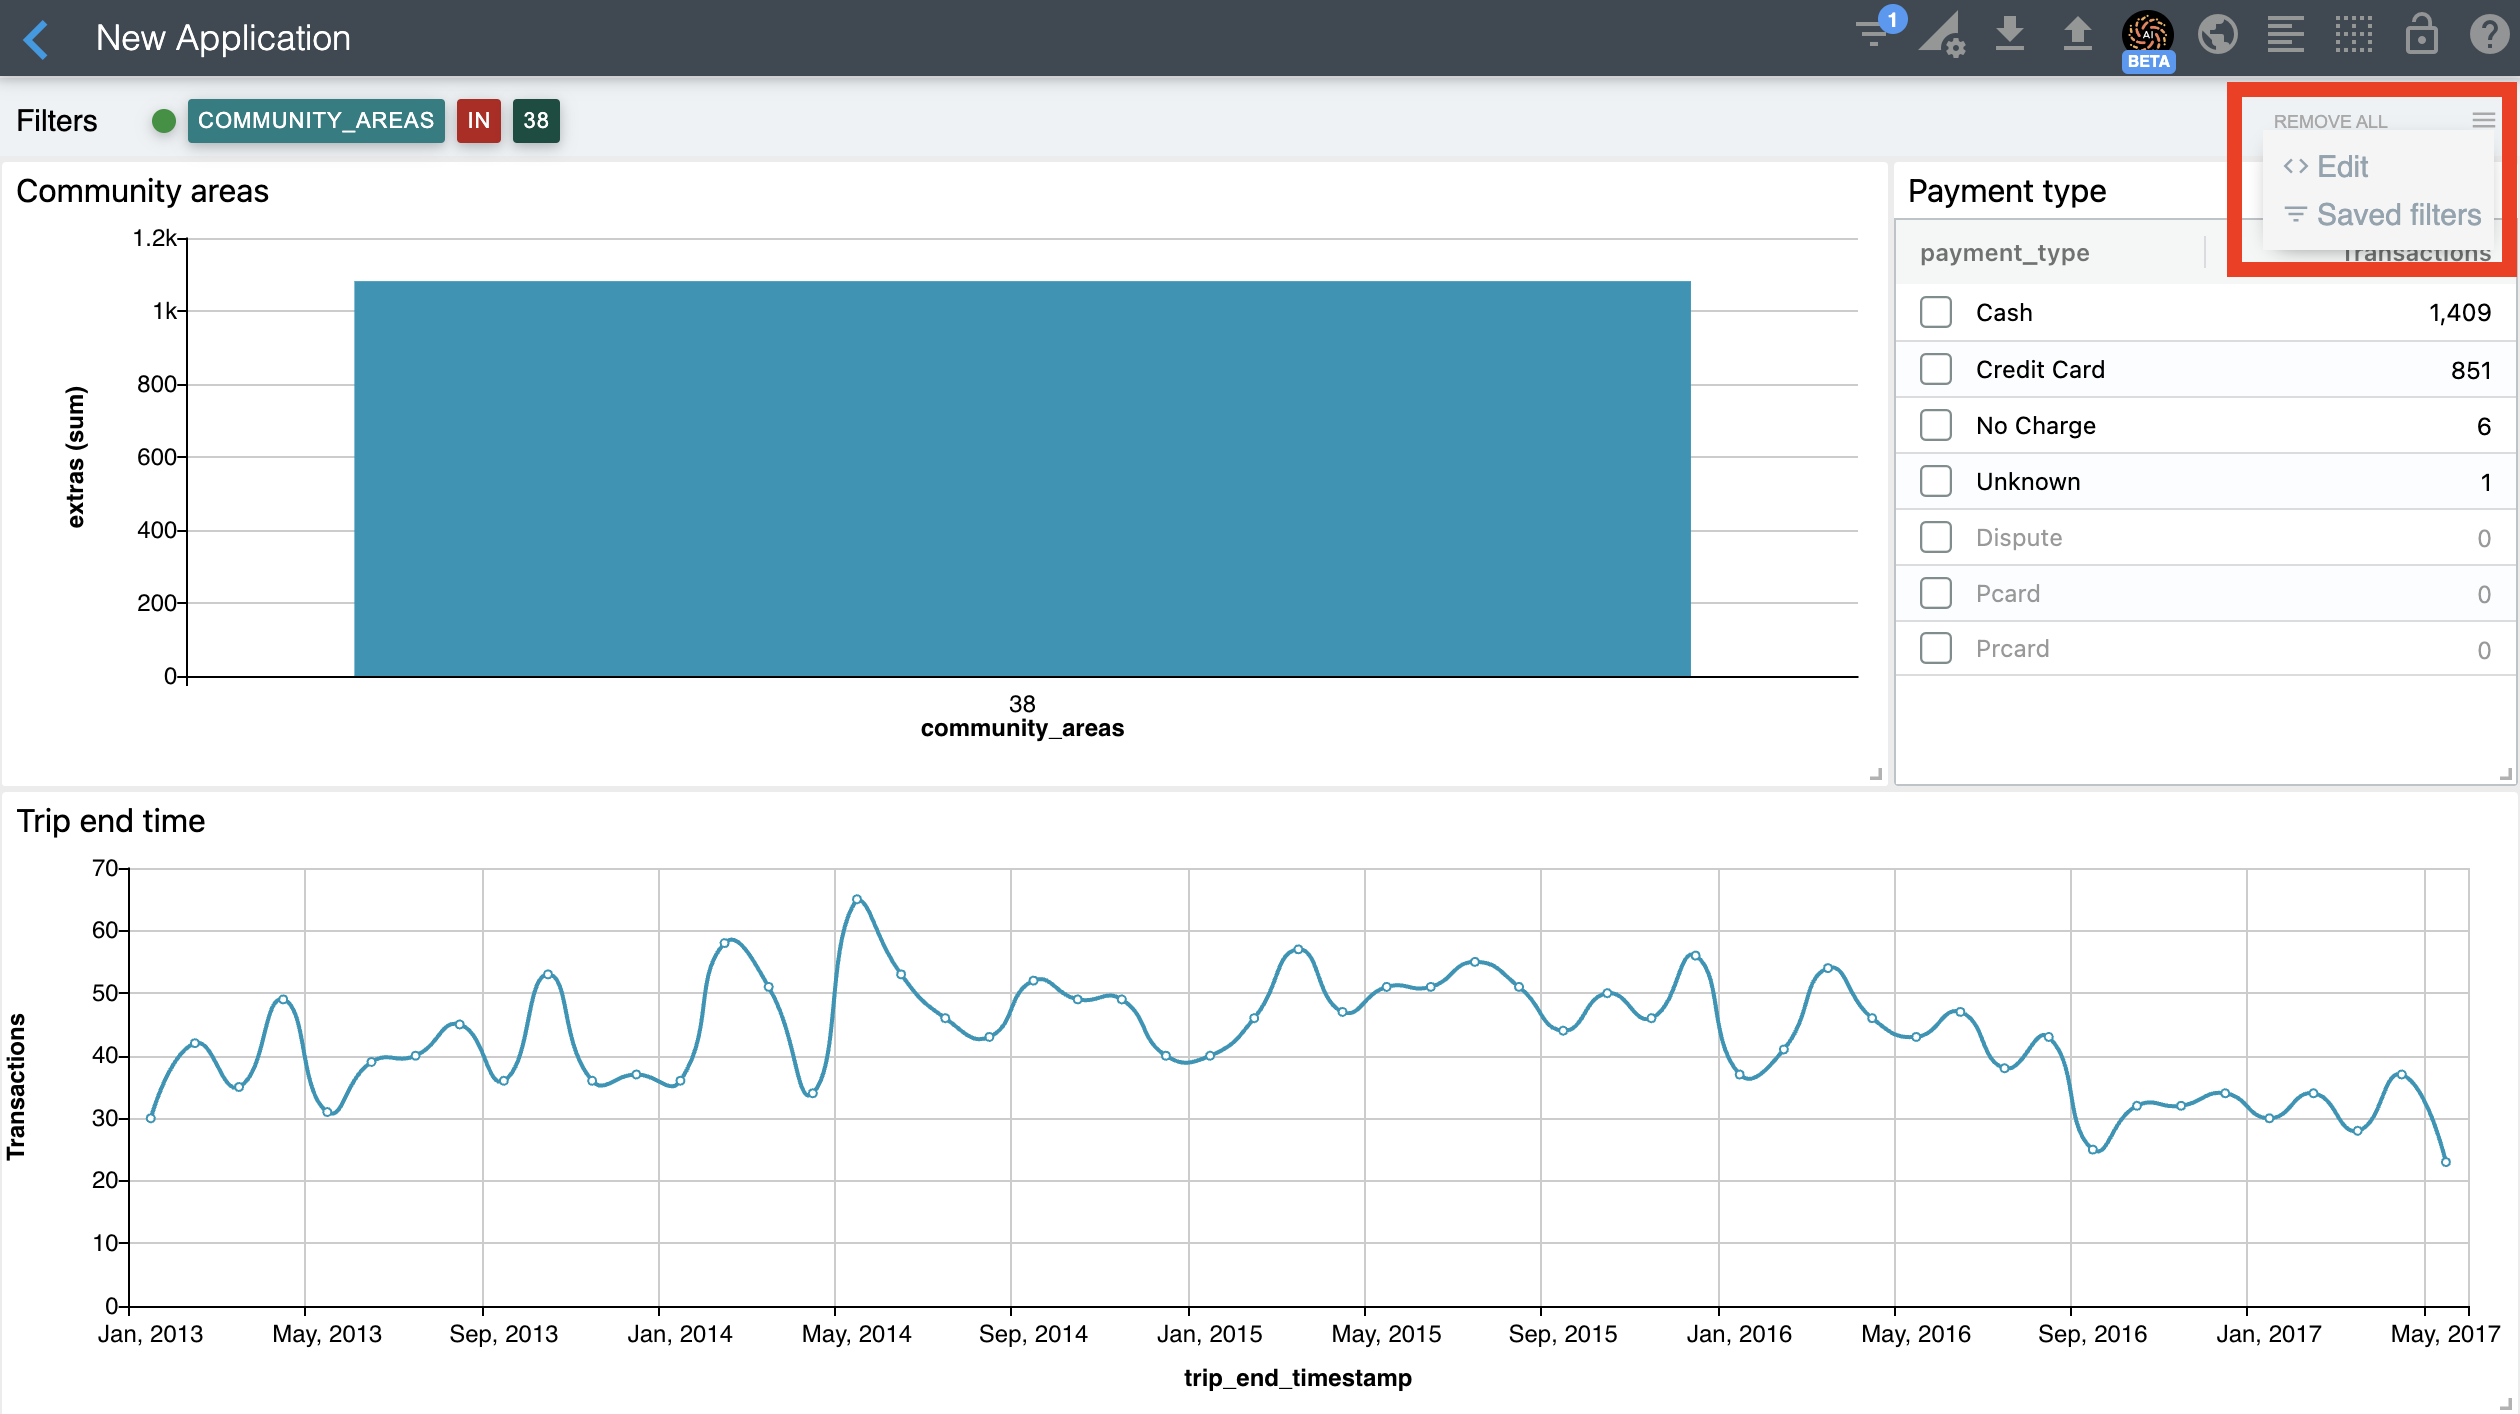
To create a saved filters item, first add some filters to your dashboard. Then use the Interaction manager menu to select the save filters option as shown below.
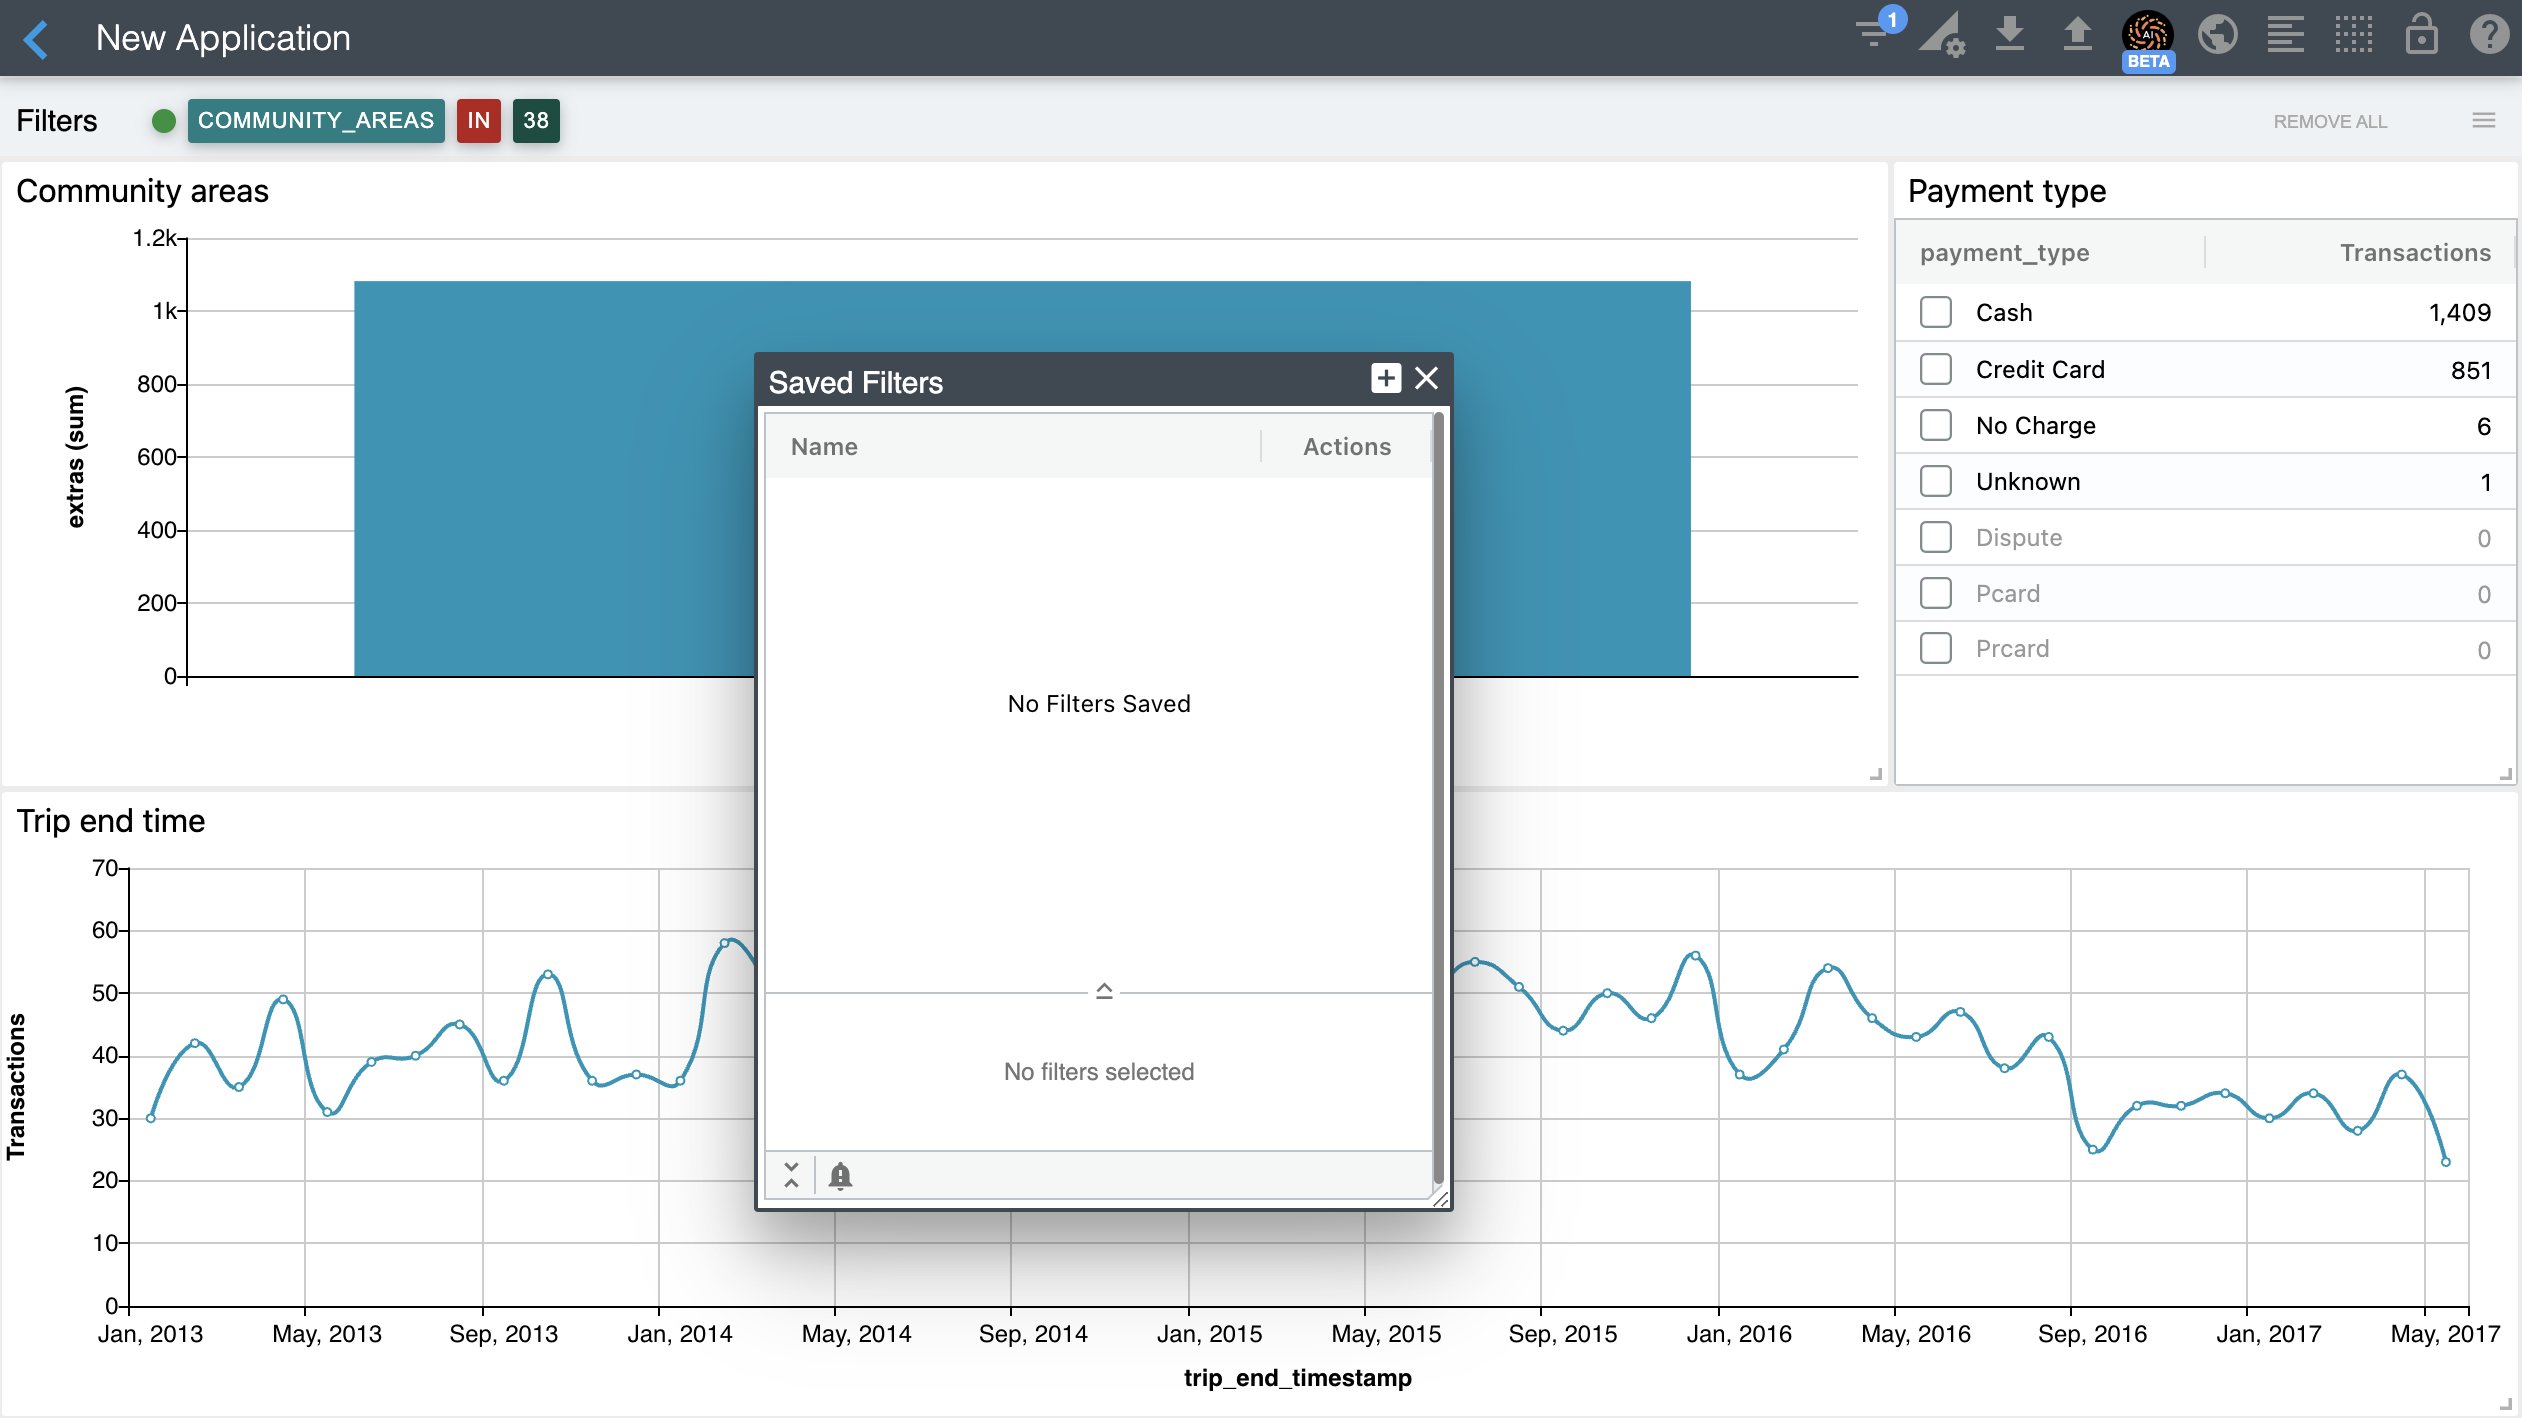
You should now see your saved filters window as shown below.
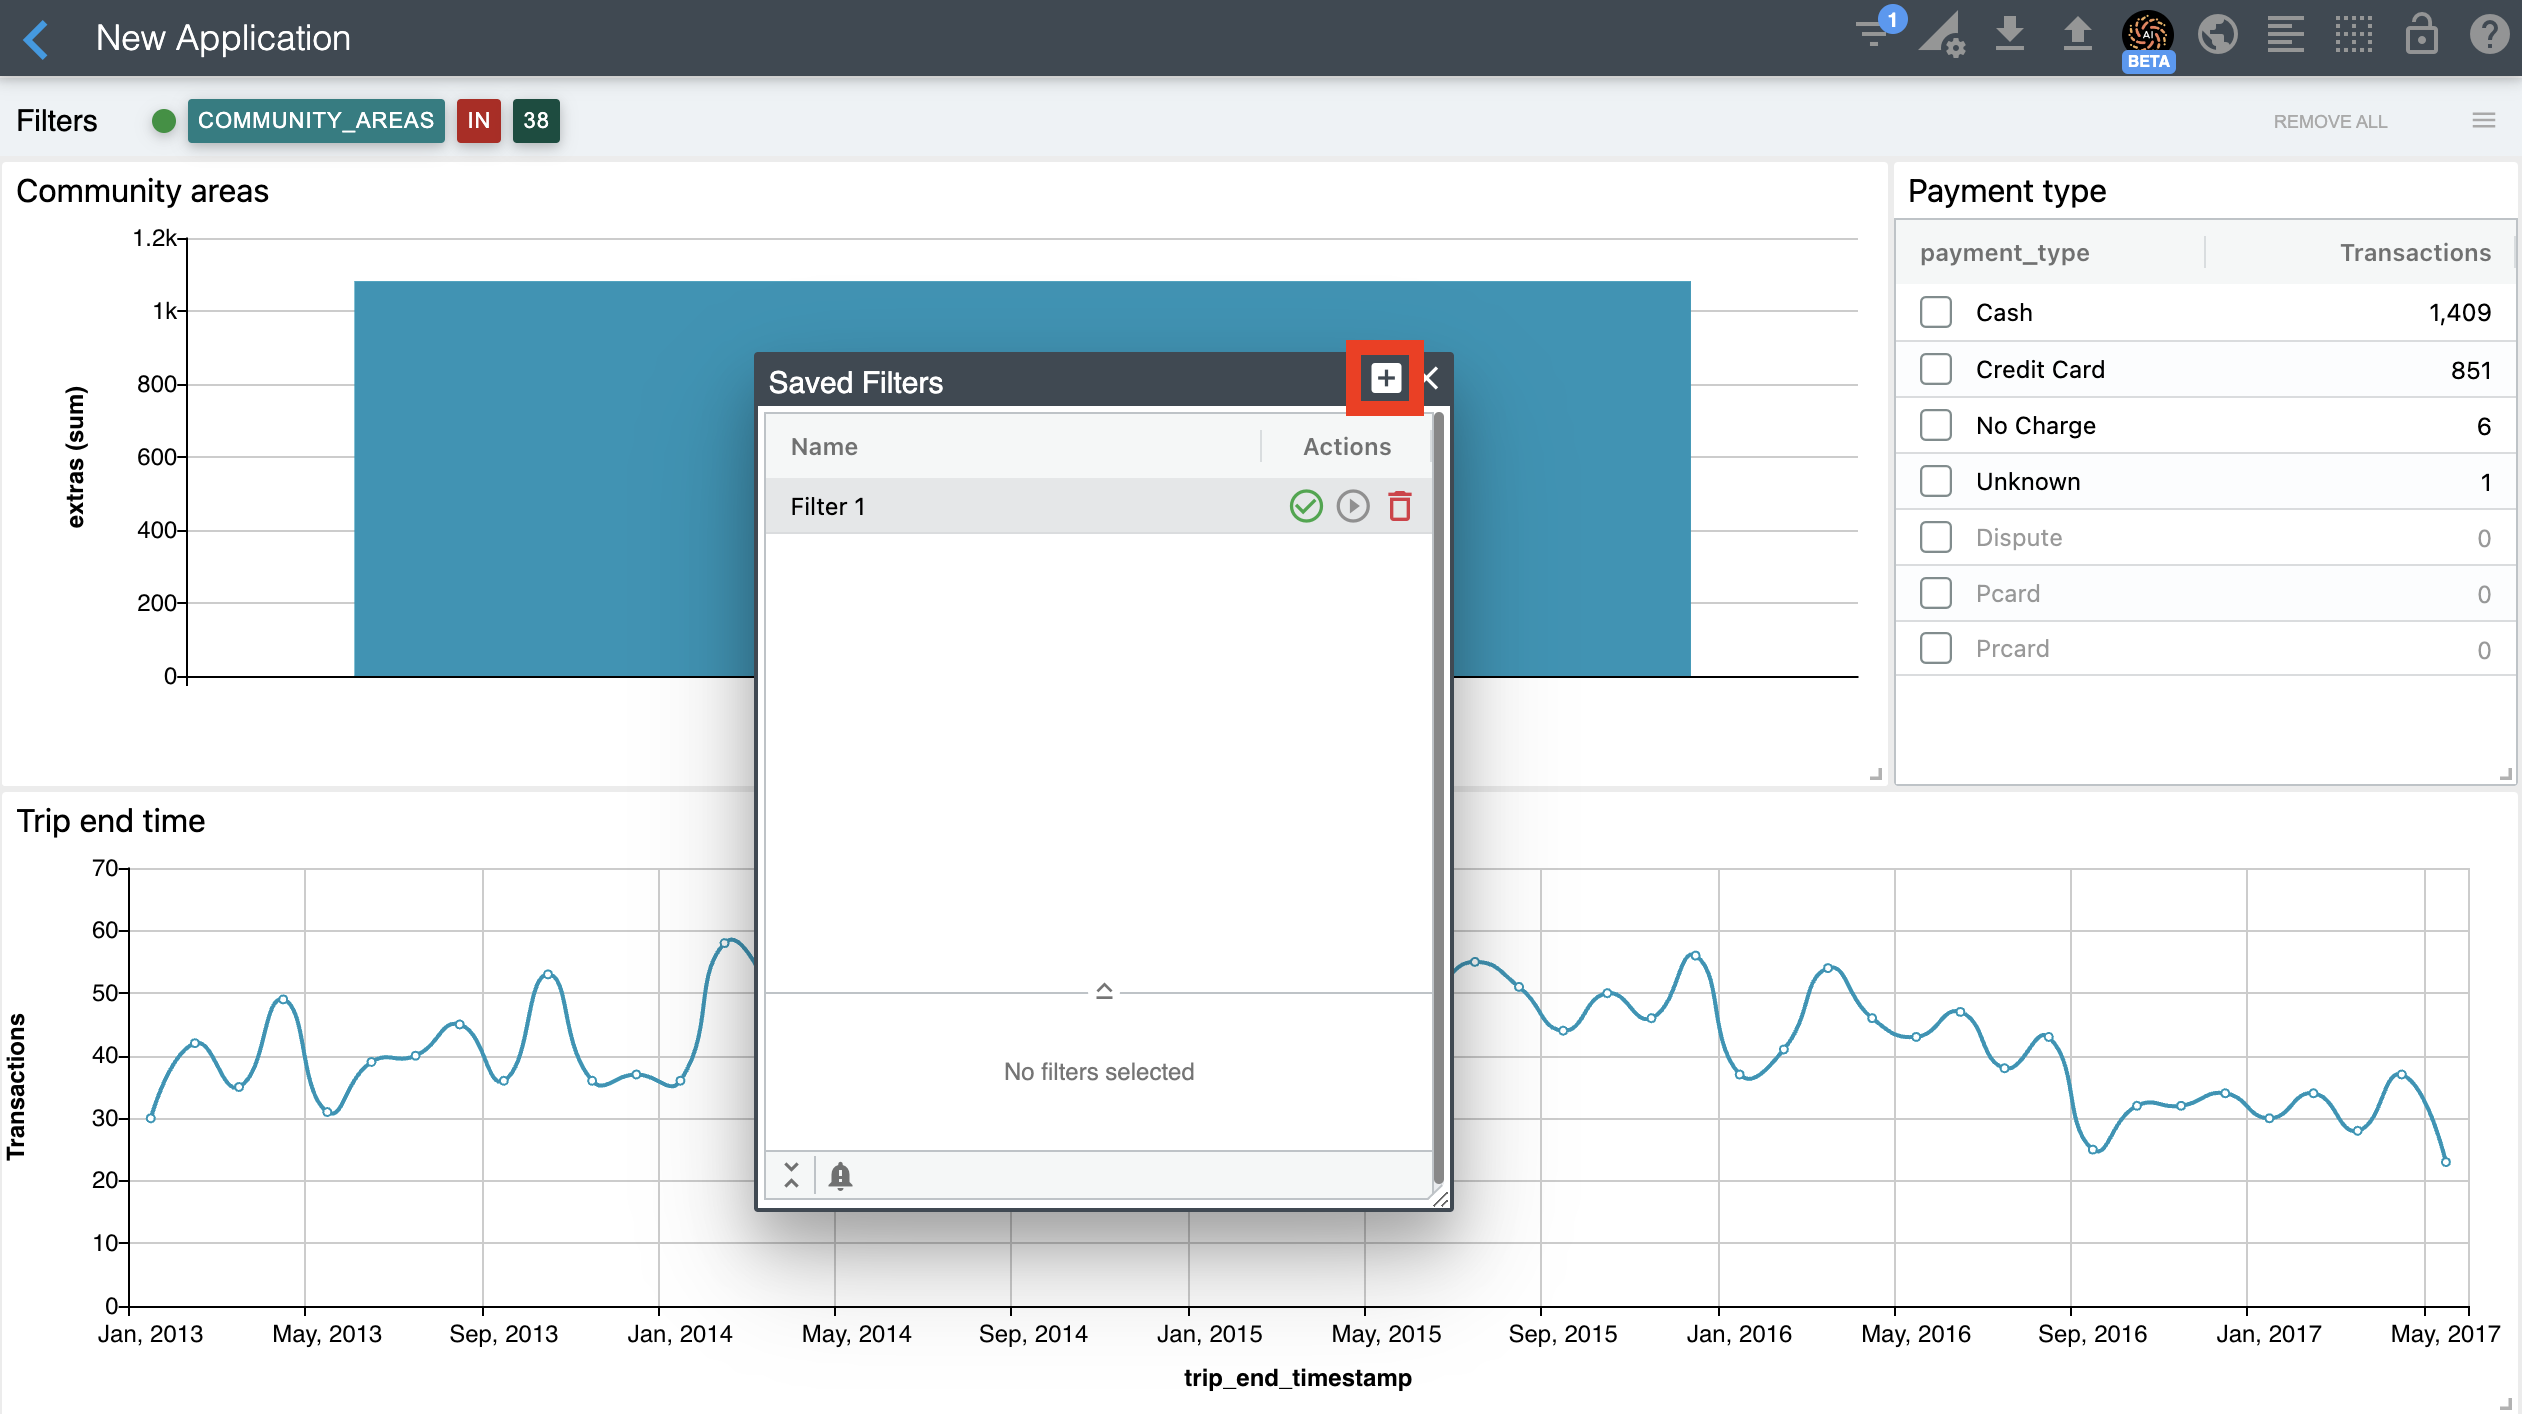
Select the [+] option on the top right corner of the saved filters window. You should see your newly created filter as shown below.
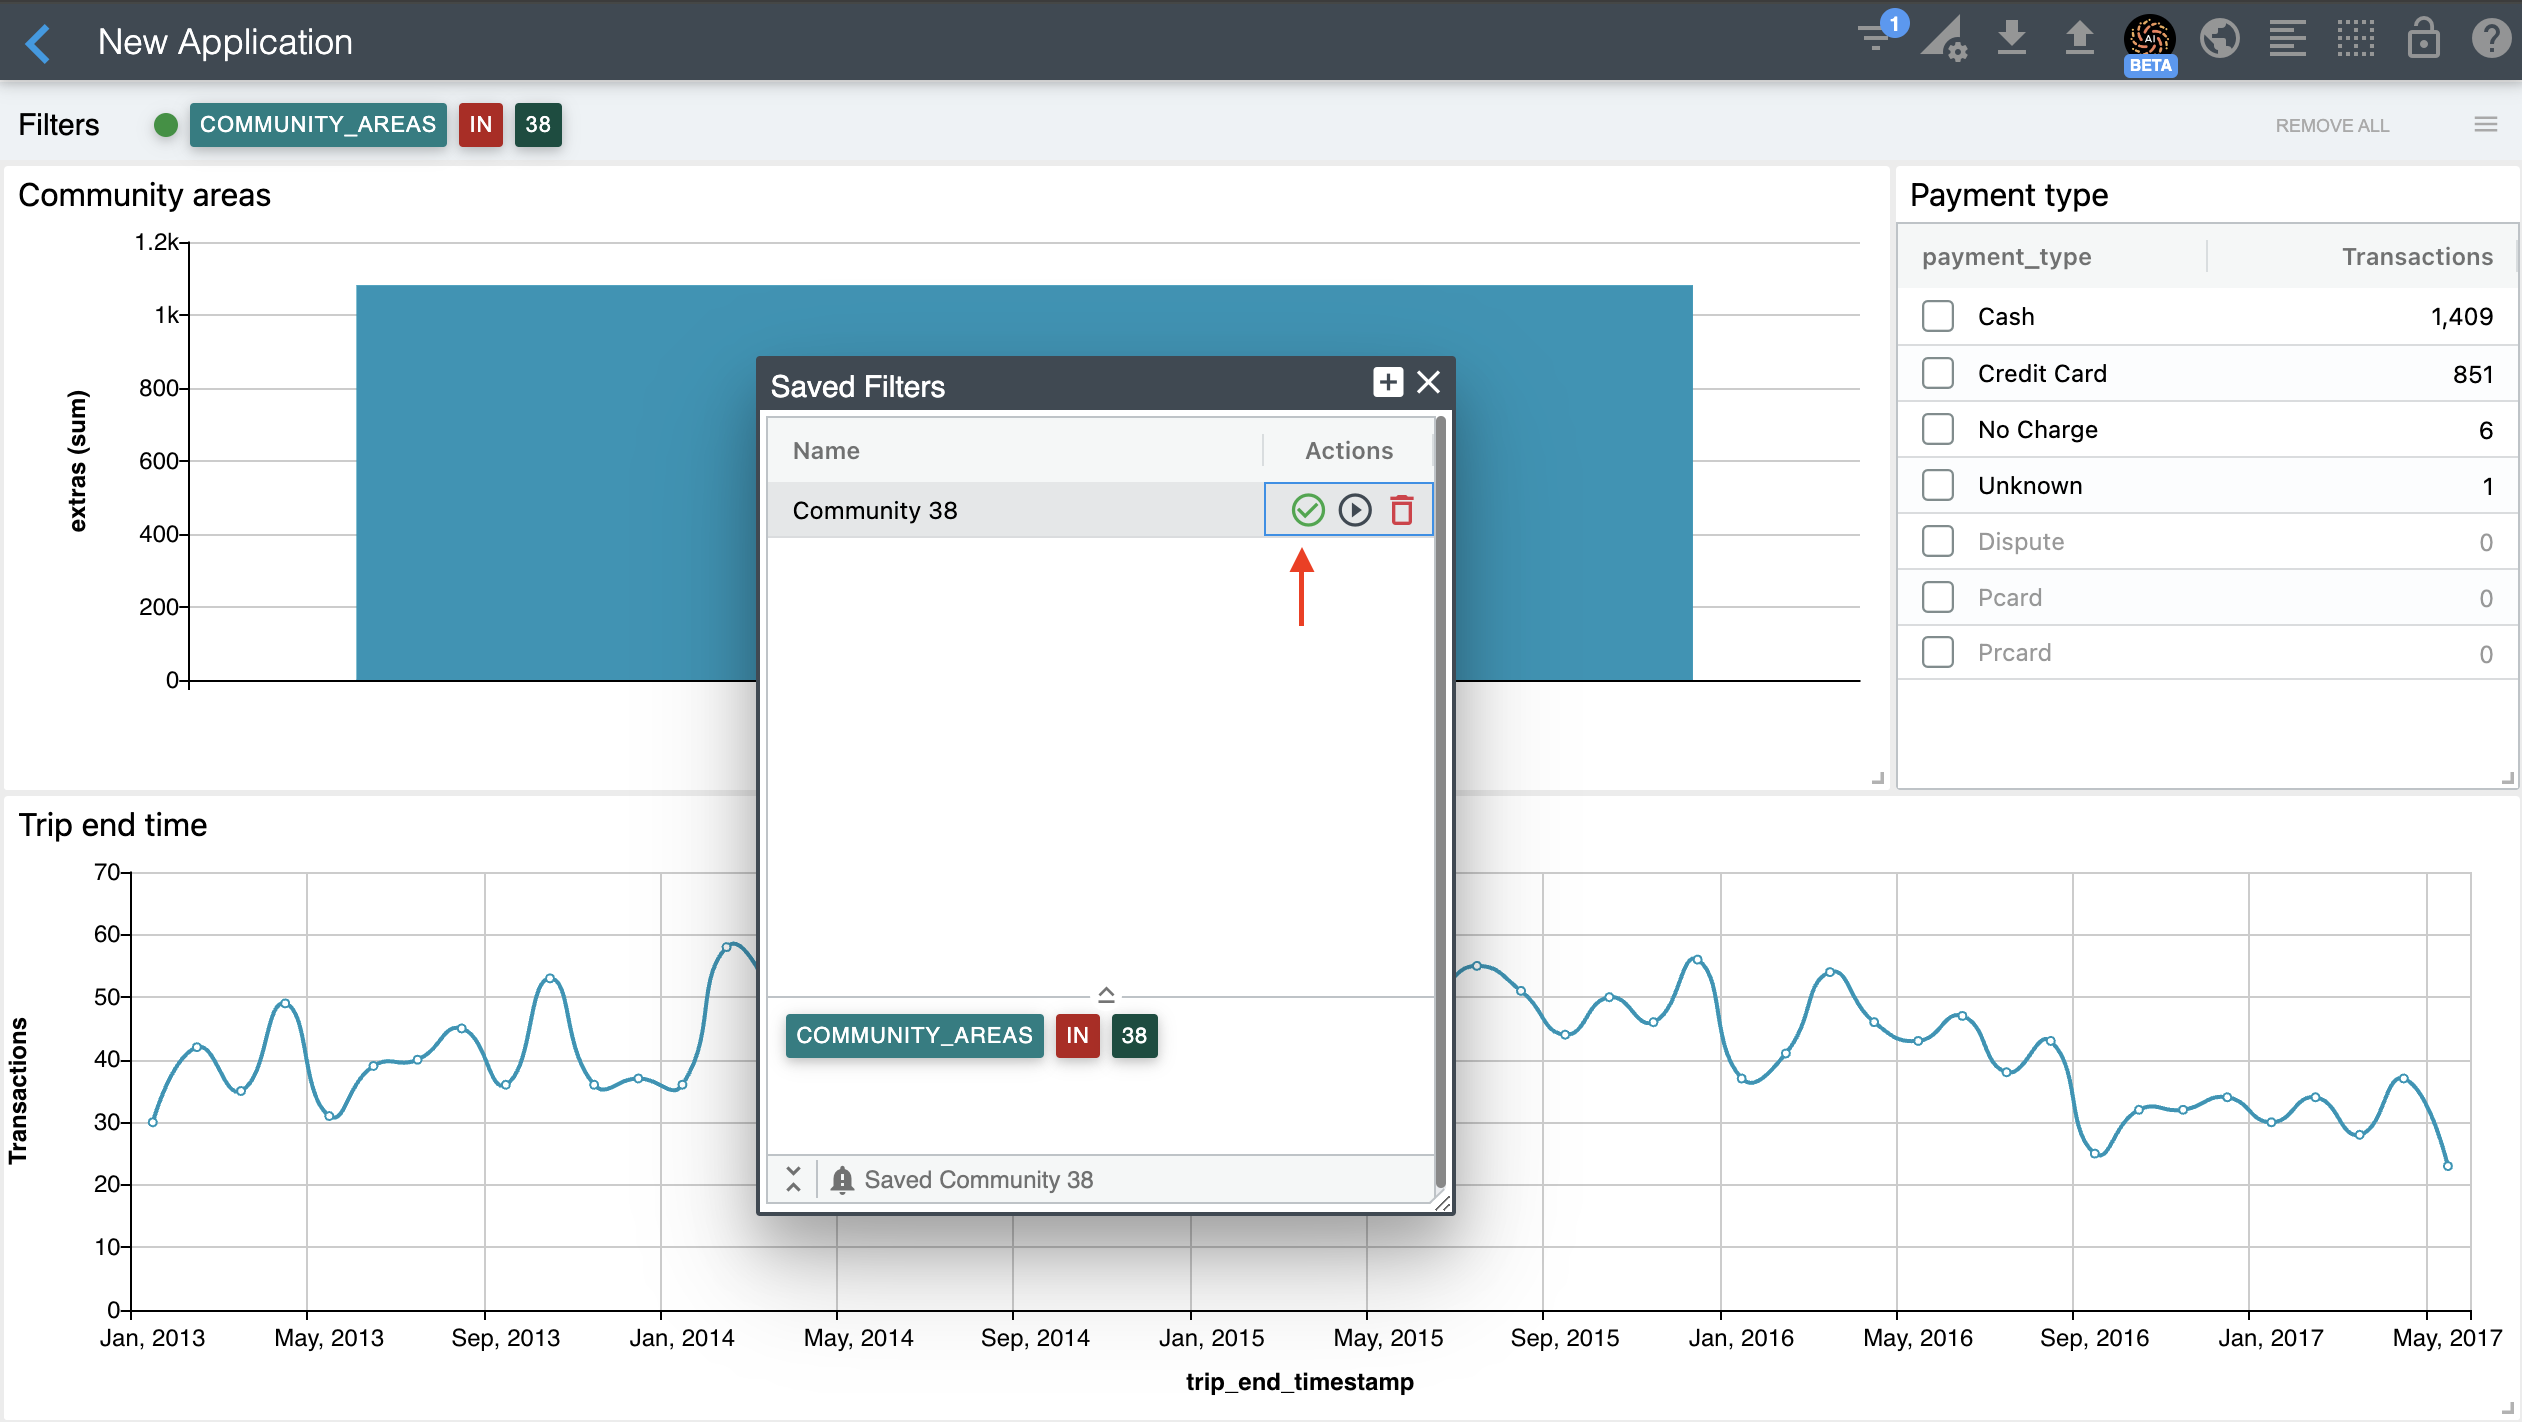
Now, double-click on the newly added saved filters name to edit it. Update the default name and choose the save action to save it. The save action is the green check icon in the actions column. You should now have your saved filters item as shown below.
Applying your saved filters
To apply your saved filters, simply choose the apply action. The apply action is the black play icon in the actions column.
Note
If you apply the same filters as the filters currently applied to your dashboard, then the following message shows at the bottom of the saved filters window: Saved filter already applied
Deleting your saved filters
To remove your saved filters, simply choose the delete action. The delete action is the red trash can icon in the actions column. It will ask you for confirmation before deleting it.