Custom Metadata
Introduction
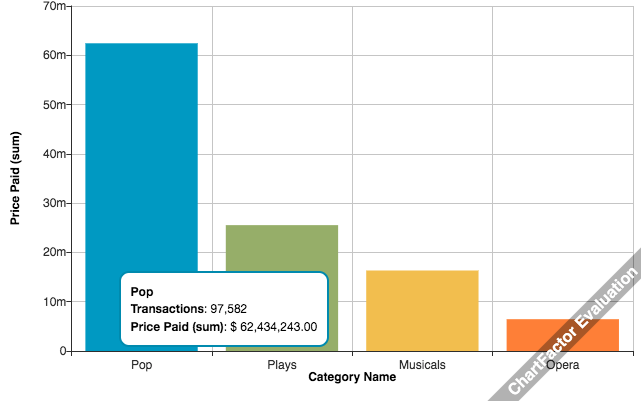
As mentioned before, source metadata is automatically introspected from the provider. For example, if we create a bar chart using ticket_sales as the source, pricepaid as the metric, and catname as the grouping attribute, ChartFactor would render a visualization like the one shown below:

You can enrich any field however, by providing extra metadata. An example with the basic structure is shown below:
1 2 3 4 5 6 7 8 9 10 11 12 13 14 15 16 17 18 19 | |
With the metadata information specified above, we are telling ChartFactor to do the following when rendering visualizations with the ticket_sales source:
- Use the Category Name label instead of the
catnamefield name - Use the Price Paid label instead of the
pricepaidfield name - Treat
pricepaidvalues as money, not just a number
Note
In the metadata example above, 'ticket_sales' is the source name.
The resulting visualization after adding the custom metadata information to the Elasticsearch provider is shown below:
We can see how the X Axis and Y Axis show field labels rather than their fields names. Also, the tooltip is rendering price paid values with currency symbols, which are also configurable and explained on the next sections.
Metadata structure
As we saw in the previous example, the structure to update field metadata is the following:
1 2 3 4 5 6 7 8 9 | |
Accessing the data provider's current metadata
You can access the current provider's metadata as follows:
1 2 | |
Note that this is a read-only structure. Custom metadata is provided as shown in the Introduction section.
Transactions/count label
The default label for the count metric is "Transactions". Sometimes, you may want to change this label to something more descrptive such as "Calls" for call center records. The example below shows how to do just that:
1 2 3 4 5 6 7 8 9 | |
Timezone support
Something awesome you can do with the custom metadata is time zone handling for your datetimes and timestamp fields. You can convert from one time zone to another and use it to display your data. For more information on how to use time zones with the custom metadata go here.
Updating time granularity
Sometimes the default granularity of a time field in the data source is not what we need. To update it, use the timestampGranularity attribute to pass the new granularity as shown below. Valid values are MINUTE, HOUR, DAY, MONTH, YEAR.
1 2 3 4 5 6 7 8 9 10 11 | |
Custom date formats for TIME fields
By default, time fields are displayed in EEUU format depending on the granularity. So for example a field with DAY as granularity, will be displayed like: Jan 03, 2008. If we want to change the display format of a given field and granularity, we can do it as follows:
1 2 3 4 5 6 7 8 9 10 11 | |
With the configuration above, any visualization using that field will be shown as 03 Jan 2008 if it is DAY or January '08 if it is MONTH.
If we have several time fields and we want them to use the same format we don't need to define the one by one. We just use the source level displayFormats property:
1 2 3 4 5 6 7 8 9 | |
Field level formats will always have higher priority over source level formats.
ChartFactor uses the momentjs library, which mean that you can use any of these string formats to create your custom.
Custom formats for numeric fields
Similar to date fields' custom formats, numeric fields such as INTEGER, MONEY, NUMBER and PERCENT can be also formatted.
Allowed formats are used according to the library Numeral.js formats, with a very slight modification.
1 2 3 4 5 6 7 8 | |
In the example above, hightPrecisionField will be formatted by delimiting thousands by a comma, and with 5 decimals values.
If we want to apply source level formats, we can accomplish it by using the field type:
1 2 3 4 5 6 7 8 9 10 | |
Currencies
For fields of type MONEY, ChartFactor formats the value by placing the dollar symbol ($) before the value (ie: $ 100). This can be changed to use any other currency and position:
1 2 3 4 5 6 7 8 9 10 11 12 13 | |
In the above configuration the euro is defined as global currency, this means that any value of type MONEY will be formatted with that currency, ie: € 22.30, € 100,00.00, etc. On the other hand price_yen has its own currency and format, so for it will have values like: 22.30 ¥, 100,00.00 ¥, etc.
Notice the use of the dollar symbol in the price_yen formatter. This is not a mistake. The $ will tell the position of the currency for the value, and it will be replaced then with the right currency afterwards.
Delimiters
By default, Chartfactor uses the same delimiters provided by numeral.js: comma for thousands, period for decimals. To change this in numeral, some extra steps are required, like having an locale configuration and so on. ChartFactor simplify this step by using just the format:
1 2 3 4 5 6 7 8 9 10 11 12 13 14 15 | |
Notice that here we're using the period (.) for thousands separator and comma (,) as decimal separator. Also an extra i was added at the end of the format. This i tells the formatter that the current format string has inverted delimiters, so use them as specified.
So the above example will convert 100000000 to 100.000.000 for the case of numeric_values and 200000 to 200.000,00 € for price_yen.
Only commas and periods symbols can be used as delimiters.
Additional properties
You can also specify Metric properties such as hideFunction and position.
Note
Please refer to your specific data provider (e.g. Elasticsearch) for provider-specific custom metadata such as custom routing.
Programmatically updating source custom metadata
In most cases, you can provide customizations to your source(s) metadata when setting the provider as shown in the Introduction example. This typically executes when your app first loads.
In some cases, however, you may need to provide source metadata customizations dynamically. Am example is when source metadata is updated by a different application and retrieved by your application using an external API.
The addSourceMetaData(sourceName, sourceConfig) function supports this use case. See the example below.
1 2 3 4 5 6 7 8 9 10 11 12 13 14 15 16 17 18 19 20 21 22 23 24 25 26 27 28 29 30 31 32 33 34 35 36 37 38 39 40 41 42 43 44 45 46 47 | |
Please note the following:
- As shown in the example above, the best practice is to unregister and re-register the provider before calling the
addSourceMetaData()function for your sources. This is because source metadata is inmutable after users perform a query for that source. It's ok to do this once before updating multiple sources. - The
addSourceMetaData()function is available at the provider and provider.metadata level. Theprovider.metadata.addSourceMetaData()allows for an optionalmergeparameter which defaults totrueif not provided. See the parameter description below:
Parameters
- sourceName: This is the name of your source
- sourceConfig: This is the custom metadata configuration for your source. See example above.
- merge: This parameter is only avaialble when invoking the function from the provider's
metadataobject. It allows to update the metadata of existing fields in addition to adding new ones. Defaults totrue.